"it"
"it"
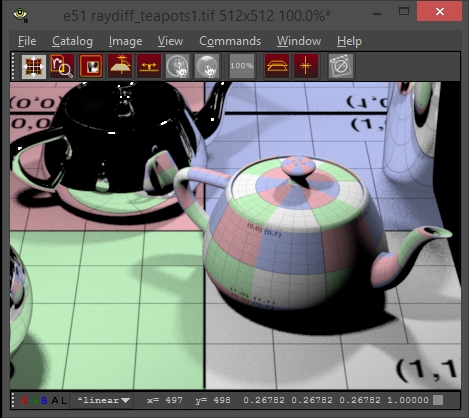
"it" is a robust framebuffer/render view window, offering complete floating point support and a powerful and flexible catalog, as well as a fast and powerful imaging tool that is capable of production-qualilty image manipulation and compositing usually found only in high-end standalone products.
Using "it" with RenderMan for Maya
"it" is powerful, stable, useful, and tightly integrated with Maya and Katana. "it" can run in a standalone mode, through the User Interface or via the command line, or you can select "it" as your preview render display from the Render menu. When "RenderMan" is selected as your renderer you can select the options menu for Render Current Frame and choose between internal renders to Maya's Render View or "it", as well as external renders to "it".
When rendering to "it" through Maya, your images are no longer viewed through Maya's Render View window; a new "it" window is opened. The "it" window can be customized by selecting options in the first two sections on the "Window" menu These optional windows and toolbars can be shown or hidden from the menu, or toggled on or off with their associated hot key as displayed in the menu. They can also be docked into the main window or left as floating windows. Double-clicking on the title bar of one of these sub-windows will toggle it from docked to undocked. Toolbars, such as the "Pixel Readout" toolbar, don't have a title area since they are so small and instead have a grab handle at the end or top that is used to place them. The grab handle can also be double-clicked to toggle the docking.

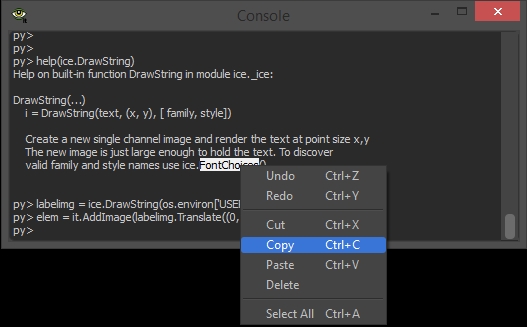
Right-clicking in the image area of the window also provides access to the menus. Other windows that are accessible on the "Window" menu such as the "Console", which provides python scripting access to "it" are not dockable and appear as top level windows.

Using "it" with RenderMan for Katana
In Katana, change PrmanGlobalSettings' plugin/renderDisplay from Monitor to "it". When rendering to "it" through Katana, your images are no longer viewed through Katana's Monitor; a new "it" window is opened.
Special "it" Features
Views
Views in "it" are a combination of zooms, pans, pixel aspect ratio and view mappings. By default all images in a catalog share a view. This is convenient when you want to step through a shot that you've rendered to "it" (hot key PageUp/PageDown). When you zoom in and step to the next frame in the shot the zoom and pan remain the same. However, sometimes you'd like to be zoomed way in on one image to look at some feature and then flip between that and a zoomed out image. "it" accomodates this with Custom View. When you turn on Custom View for an image, that image then has its own zoom and pan, independent of the other images in a Catalog. Custom Views are saved if/when the Session (or Catalog) is saved.
Pixel aspect ratio is useful when working on projects that generate non-square imagery. One example of this is the film format Cinemascope. In some pipelines you might decide to keep your digital files in a format where a pixel is half the size in the horizontal direction than the vertical. 'it' allows you to specify this in the view so that on your monitor images look normal. This menu is fully configurable from your it.ini file including the names on the menu and the aspect ratio of the pixels. You may also attach short cut keys to different aspect ratios even if you customize this menu.
Recent Bucket Markers
When 'it' is being used as the destination for a render it will display a rectangle around each bucket as it arrives. The indicator will fade over a few seconds. This is useful when an image in being refined as it is sometimes difficult to see what part of the image the renderer is working on. This feature can be toggled on and off and the color of the rentangle can be altered in the preference dialog.
Background
Any one image in a Catalog can be set to be the Background image. When you then select other entries in that Catalog, the displayed image is the result of compositing the selected image over the nominated backgound.
Pixel Readout
When you bring up the Pixel Readout "it" provides a channel view, a remap menu, a pixel location and value readout. The pixel read out is self-explanatory. The remap menu allows some post-processing to be performed on the image (re-mapping) before it is displayed. This does not alter the pixel values in your images.
The channel view shows which of the image channels are currently visible and the options are RGB (normal color) Red, Green, Blue, Alpha (if present) and "Luminance".
Remapping
The remap menu shows the color space that your image is in. Typically this would be linear for rendered images and sRGB for 8 bit image files. By default "it" chooses the image space of the image and when it does this the image space is preceded by a *. You can use the menu to override "it"'s choice (the * indicator will go away)
"it" supports view mapping output images to accommodate your workflow of choice using the OpenColorIO system (http://opencolorio.org). Your view mapping defaults can be set for images rendered to "it" as your framebuffer (regardless of bit depth) or for imported images (with different mapping for different types, if necessary).
There are several important things to remember about remapping:
Remapping is applied only for viewing files. It is not burned in. There is a prefence for controlling whether the mapping is applied when images are saved. This option is controlled on a per-Catalog basis so it is important to note that when changing this preference it will only affect new Catalogs. Each Catalog can also be individually set to burn in on save or not.
Images rendered via PRMan are, by default, in linear space, unless an exposure is applied to the output (which can be done in RfM via the Output Settings tab of the RenderMan controls).
If you do apply an exposure to your output, be sure to make the proper adjustment to the default image mapping for rendered images.
The OpenColorIO setup can be changed via your it.ini, though, as always, we strongly recommend making the changes in a site-specific surrogate ini file, referenced via RMS_SCRIPT_PATHS. "it" will also use the environment variable OCIO if it is set to find the OpenColorIO config file.
A special entry on the remap menu is the Shadow Map option, which is useful for viewing shadow map files. These files can have huge ranges that are well beyond zero to one, so the traditional way to display these has been to rescale the min and max values to zero and about 0.9, and then invert them with (1 - val).
If you have used sho from RenderMan Pro Server to view shadow maps, this is what you have been looking at. The actual script that performs this operation is:
element = it.GetCurrentElement()
image = element.GetImage()

offset = ice.Card([1.0/16.0])
minusone = ice.Card([-1.0])
(min,max) = ice.GetMinMax(image, returnCards=True)
result = minusone.Multiply(image.Subtract(max).Divide(max.Subtract(min))).Add(offset)
Sequences
Sequences are for when you've rendered a shot or perhaps a wedge of parameters to a shader and now you would like to see them all played as a sequence. The Sequence toobar has the controls for starting and stopping playback and the frame range controls. "it" will either play the whole catelog or you can open a set of images on disks as one element (called a "sequence"). There is also a "scrub" mouse tool which when activated lets you move through a sequence by dragging with the left mouse button in a horizontal direction.
An image sequence can be created by opening multiple files on disk in a directory, use File->Open Sequence instead of File->Open Image. "it" will discern which files belong to the sequence; and the frame range will appear in the Sequence toolbar.
Sequences are low tech in that they don't provide a way to save or load movies, and the entire "movie" is held in RAM. "it" places a cap on the number of images it will hold in RAM so for smooth playback you will need to set that cap (Image Cache Size) to at least the number of frames in your sequence.
