Holdout Workflow
Holdout Workflow
Why Do We Need Holdout?
In movies and commercials, we often need to composite the CG objects over a live action plate. To convince the audience that the CG objects are real and belong to the scene, we need to use a holdout object to collect the CG objects' shadow and reflection that match very closely to the shadow and reflection in the live action plate.
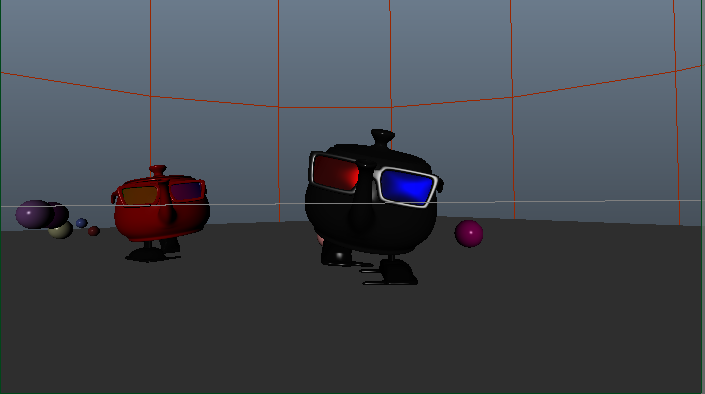
Say we have some CG teapots, spheres, and a CG ground plane that is used as a holdout object:
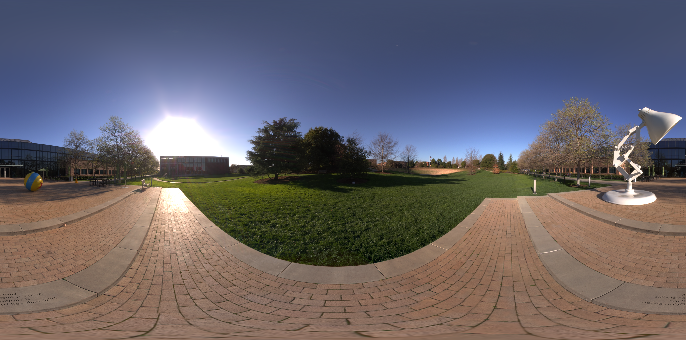
We shot an environment and have the following environment map:
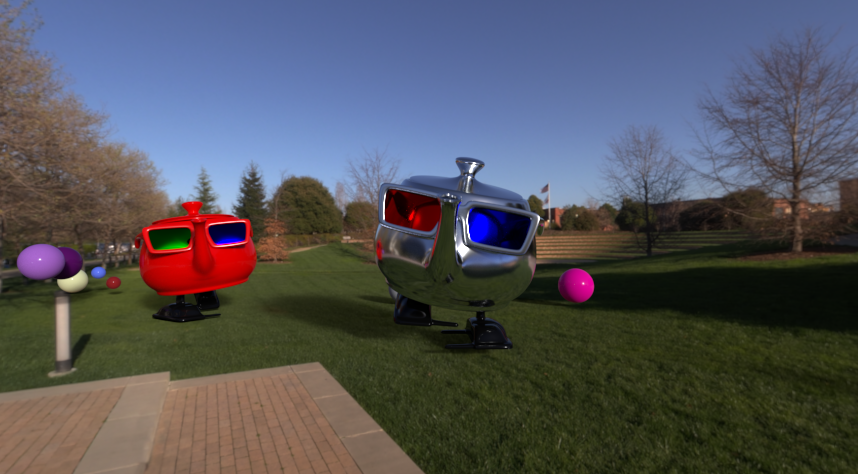
We create an environment sphere light with its primary visibility turned on and use this environment map. Then we create a holdout object to collect the CG objects' shadow and reflection. We get this render below:
Quick Introduction
Typically, we use a "holdout" shader to collect shadow and reflection on a selected geometry such as a ground plane. For Maya users, this is like the Use Background shader. For the holdout geometry, the shadow collected will replace its beauty's alpha channel whereas other channels will replace its beauty's RGB.
In RIS, holdout is implemented as an LPE prefix, not as a RIS Bxdf. This is different from the implementation in Reyes, where the RMSHoldOut shader is limited to a predefined material. The benefits from the LPE implementation include:
- As an LPE prefix, we can assign any Bxdf or layered Bxdf to the holdout geometry!
- Since it is just an LPE prefix, it means lpegroups and lighting groups work with the holdout.
- This gives us the flexibility to adjust all material properties of the holdout geometry as well as reassign it to a different material easily (when the background plate changes).
- The collected shadow or reflection, for instance, will reflect the properties of the material. The indirect illumination of the surrounding geometry will also reflect the holdout's material's response.
- Additionally, as an LPE prefix, we can collect any channel, not just the shadow and reflection as long we prefix the LPE string with "holdout" and it is not limited to direct lighting only.
- If you already have your LPE setup, it is easy to add/remove the "holdout" prefix which allows us to preview the collected channel interactively.
- Prefixing the LPE with "holdout" does not affect the AOV's file output. It allows us to preview it interactively for a quick turnaround. Once we like the result, we can simply remove the "holdout" prefix. In some cases where we do not want to output the LPEs but keeping the holdout, we can set the LPE's output driver to null.
- Since only the integrator knows about the lighting transport information, it is logical to implement the holdout as an LPE prefix. This avoids redesigning RIS' infrastructure.
Limitation
- Holdout LPE prefix only works with the PxrPathTracer integrator since it requires lpegroup. Currently, lpegroup is only implemented in the PxrPathTracer.
- Holdout objects currently are interacting with each others. A workaround is to render them as separate passes.
How to Set Up Holdouts
Using Maya
To set up a holdout in RenderMan for Maya, follow these steps:
- Assign a Bxdf to the holdout geometry such as the ground plane. This defines the material of your holdout geometry to match your background. It can be any Bxdf or layered Bxdf.
- Select the geometry for the holdout.
- Click the holdout button.

- Enter the holdout name. This will be the LPE display channel name. By default, shadows and reflections will be collected. We can collect other channels as well by simply clicking the check box for each channel.
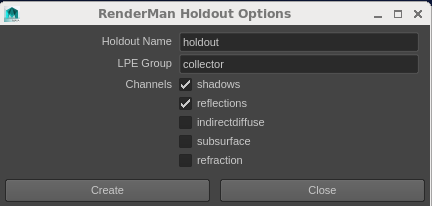
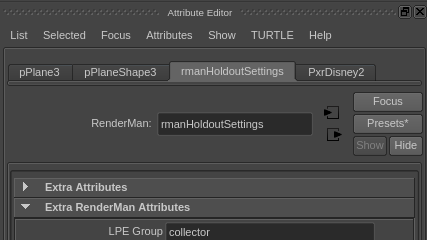
Enter the LPE Group name. Note that the name must be prefixed by "collector". The integrator will ignore any LPE group for the holdout if their names are not prefixed with "collector". By default, lpegroup is set to "collector" since we have predefined LPEs: shadowcollector and reflectioncollector.
- If the lpgroup already exists, it will simply include it for the holdout LPE.
- If the lpegroup does not exist, the holdout button will add it to a shared settings node which is wired to the geometry. It appears in the Attribute Editor tab as rmanHoldoutSettings.
- Select the Create button. This will create the LPE render output with the "holdout" prefix.
Holdout Background
There are several ways to specify or create a "background" for the holdout in Maya:
Image plane
No action is required. If the the image plane trace set does not exist, the render will automatically emit the appropriate trace set for the holdout to work. By default, the name of this trace set is "rman__imageplane". This can be changed in the integrator imagePlaneSubset parameter.
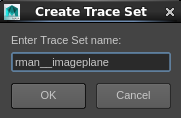
If you choose to add your own trace set, you can do that by selecting the image plane, then select the following from the RenderMan menu.
RenderMan > Create > Create Trace Set
Set the trace set to following:
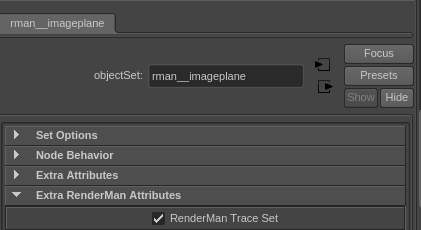
rman__imageplane
When the trace set is created correctly, double check to make sure the RenderMan Trace Set is on.
Environment Sphere
Another way to specify a background for the holdout is by turning on the Primary Visibility of the environment sphere light. It needs to have the rman__imageplane trace set as well. Again, the renderer will automatically emit it to the RIB if the trace set does not exist.
Toggle Background in "it"
We can comp the holdout render onto a 2D image in "it" by simply making it a background image:
Image > Toggle Background
Using Katana
To set up a holdout in RenderMan for Katana, follow these steps:
- Assign a Bxdf to the holdout geometry such as the ground plane. This defines the material of your holdout geometry to match your background. It can be any Bxdf or layered Bxdf.
- Set up the LPE as usual and add the "holdout" prefix.
If you already have an existing LPE set up for the shadow and reflection collectors, simply include the "holdout" prefix at the beginning of the LPE (e.g. lpe:holdout;shadowcollector). Note that this does not affect the LPE file outputs. You can have both holdout and file outputs.
If you don't have an LPE setup for the shadow and reflecton collectors, you'll need to set up an LPE prefixed by "holdout".
There is a set of built-in LPE groups which can be used for the holdout. If the built-in collection does not meet your needs you can also define a custom LPE group for the holdout.
Using a Built-in LPE Group
To set up a holdout to collect shadow and reflection using the built-in "collector" lpegroup,
- Create an lpegroup in PrmanObjectSettings for the holdout geometry. Note that the name must be prefixed by "collector".

- Create a PrmanChannelOuputDefine node for the shadow collector LPE channel. This sets up the channel name for RiDisplayChannel.
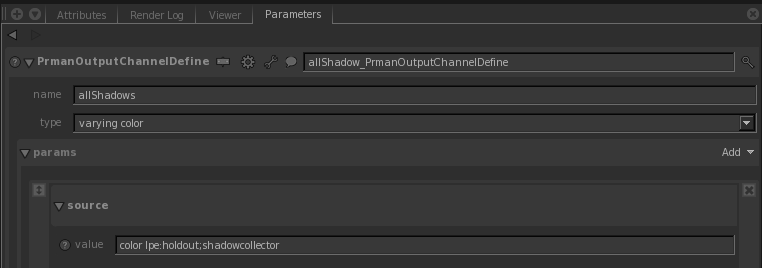
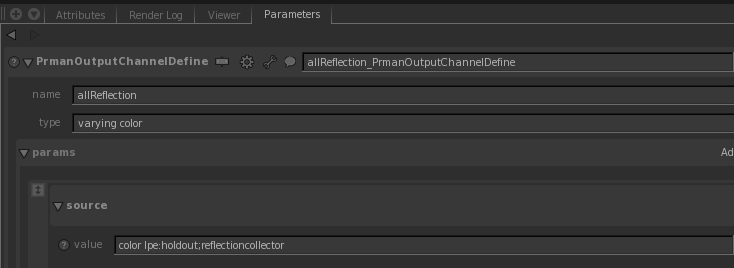
- Create a PrmanChannelOuputDefine node for the reflection collector LPE channel.
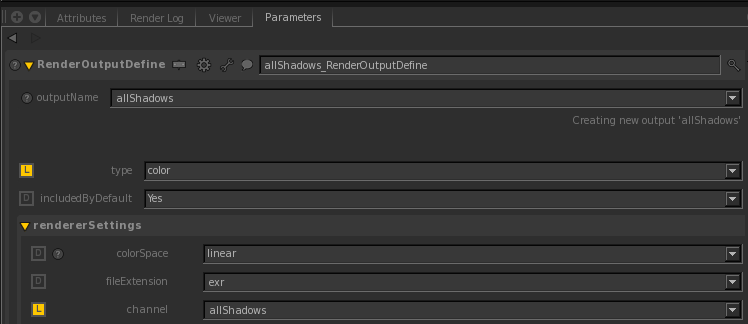
- Create a RenderOutputDefine node for the shadow PrmanChannelOutputDefine node. Note that holdout will not be processed if RenderOutputDefine is not there.
- Create a RenderOutputDefine node for the reflection PrmanChannelOutputDefine node.
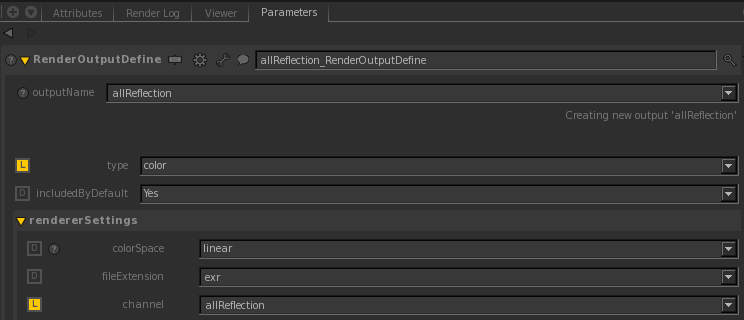
- Wire the PrmanOutputChannelDefine node into RenderOutputDefine to see the added channel in the RenderOutputDefine's channel drop down.
Using a Customized LPE Group
To set up a holdout to collect shadow and reflection using a customized lpegroup, e.g. "collectorPlane1":
- Create an lpegroup in PrmanObjectSettings for the holdout geometry.

- Create PrmanChannelOutputDefine node for the shadow.
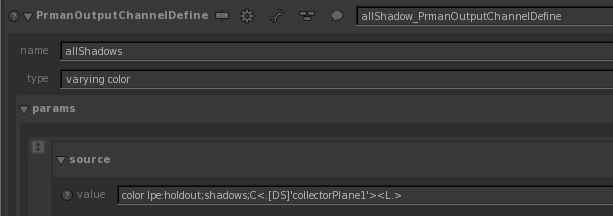
- Create PrmanChannelOutputDefine node for the reflection.
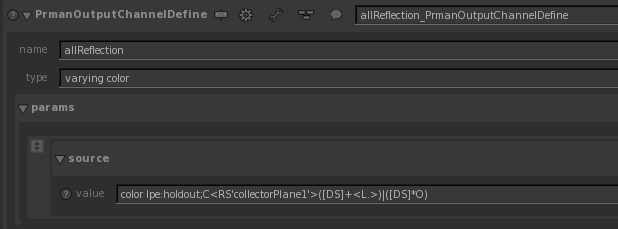
- Create a RenderOutputDefine node for each PrmanChannelOutputDefine node and wire the PrmanOutputChannelDefine node into RenderOutputDefine as the above.
- Run Disk Render. Since the holdout is an LPE prefix, it won't be processed if we are run Preview Render.
- To create an "image plane", we can use any geometry as long it is assigned to PxrConstant Bxdf or any emissive Bxdf. Currently, the integrator will not recognize non-emissive Bxdf.
RIB
Include "holdout" prefix in the LPE source and setup Display as a regular AOV. Note that Display is required in order for the holdout LPE to be processed.
Attribute "identifier" "string lpegroup" ["collector"]
DisplayChannel "varying color allShadows" "string source" ["color lpe:holdout;shadowcollector"]
DisplayChannel "varying color allReflections" "string source" ["color lpe:holdout;reflectioncollector"]
Display "myRender.exr" "openexr" "rgba"
Display "+myRender_shadowcollector.exr" "openexr" "allShadows" "int asrgba" [1]
Display "+myRender_reflectionCollector.exr" "openexr" "allReflections" "int asrgba" [1]
Light Group
Since Holdout is an LPE prefix, light groups also work with holdout.
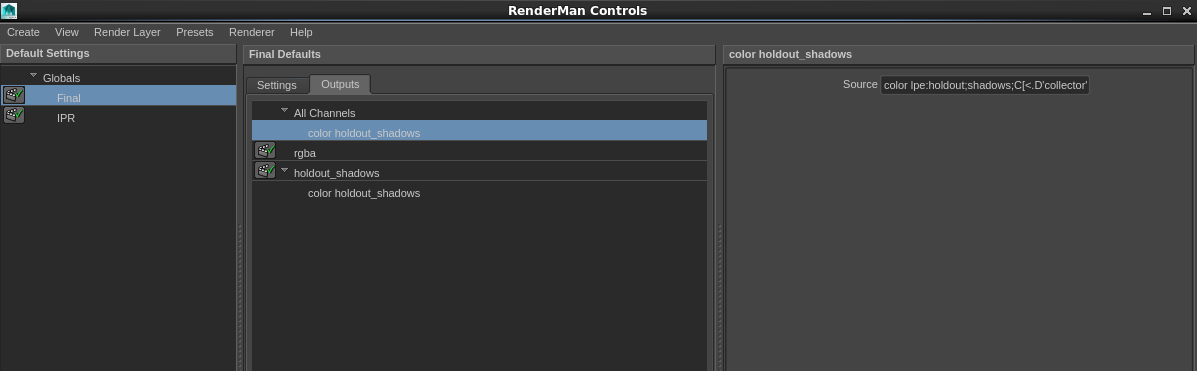
For RenderMan for Maya, simply add the light group name to the holdout channel's Source. For example, say we have a light group named "key". Create a holdout shadow collector as the above. Then in its Source, add 'key' to the <L.>:
color lpe:holdout;shadows;C[<.D'collector'><.S'collector'>]<L.'key'>
For RenderMan for Katana, there is an example file for setting up light groups: lightGroupAOVs.katana. Simply prefix each LPE expression with the "holdout" prefix for the light groups.
For RIB, See Light Path Expression on how to set up light group in LPE.