Rendering Efficiently
Rendering Efficiently
To get started, let's open the Maya scene, rendering_efficiently.ma.
(Where are the tutorial files?)
1. Knobs and Buttons
There are various controls that you can use to adjust render speed and quality. Often you'll find that you want to use different settings during different stages of the rendering process. For preview rendering, lower quality settings are often an acceptable trade-off because that allows for faster iterative renderings. For final frames, high quality setting are essential. This tutorial will give an overview of which RenderMan quality settings have the biggest impact on your scenes.
Go ahead and open the tutorial file, rendering_efficiently.ma.
2. Image Resolution
Image resolution has a substantial impact on the time it takes to render a frame. By rendering smaller images, you can substantially increase the speed of your preview iterations. An image with a resolution of 640x480 will render much faster when the resolution is reduced to 320x240. Often a small test image is all that is necessary to establish the basic "brush strokes" for a shot. Similarly, half-resolution or quarter-resolution images can be used quite effectively to experiment with large-scale changes to a scene, like shadow placement.
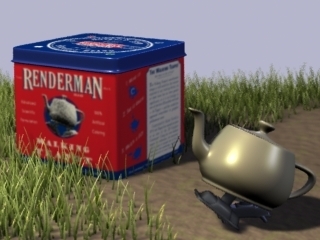
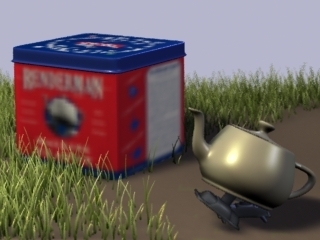
First render the Maya scene at 640x480:
Render-> Render Current Frame
Image rendered at 640x480 (Rendering time: 59 seconds):

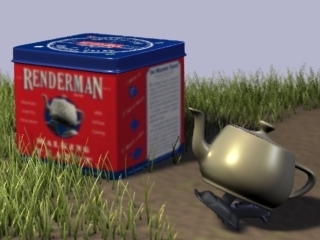
Now use Maya's "Test Resolution" Render Globals settings to switch from 640x480 to 320x240 and render the scene again:
Render-> Render Current Frame
Image rendered at 320x240 (Rendering time: 21 seconds):
By rendering the scene at half the original dimensions the render time is cut by over half.
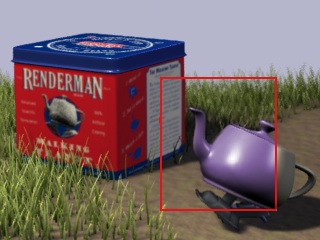
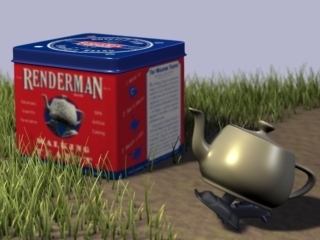
3. Crop Rendering
To further accelerate the process of iterative rendering you can render small areas of an image, using Maya's Render Region. This allows you to render only the bit of the image you're interested in, speeding up rendering even more. For example, in the image below Render Region is used as the color of the teapot is tweaked.
The render region can be used to render isolated details (Rendering time: 4 seconds):
4. Shading Rate
Shading Rate is the main global quality control for RenderMan. It's also probably the second most critical factor in speed and performance (next to the resolution). A typical shading rate for final rendering is 1.0, or less. Preview renderings can usually be done at 3.0, 5.0, or even 20.0. What is the trade-off with a high shading rate? A shading rate that is too large tends to give blocky looking colors and excessive blur on textures. As long as the color of an object changes slowly and smoothly across its surface, this will look fine. If the surface has drastic color changes, such as sharp-edged patterns in its textures, these results will be unsatisfactory.
Shading rate controls two important factors. First, shading rate governs the quality of shaders. Second, shading rate governs how many micropolygons are required on a per-pixel basis. A smaller shading rate creates more micropolygons, requiring more memory and overhead. Doubling the shading rate (from 1 to 2) usually gets you nearly twice the rendering speed.
You can adjust the shading rate in the RenderMan Render Globals Quality tab. Next render the scene with a shading rate of 2, then 5, and then 10.
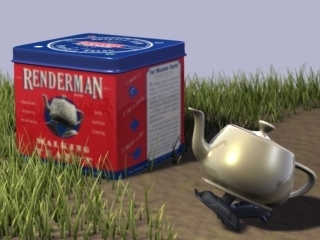
Here's a comparison of different Shading Rates. Notice that, as the shading rate increases, the textures, bump, and shadows get blurrier, until (at a shading rate of 10) the bump is gone, the texture is unreadable, and the shadows are very blurry. Also notice that the shading rate affects shader quality the most, while the geometry (the grass, teapot, and box) retains the original form.
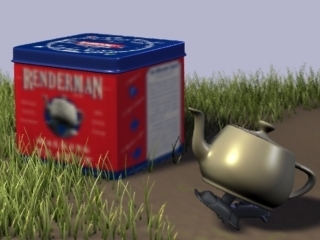
Shading Rate of "1" (Rendering time: 21 seconds):
Shading Rate of "2" (Rendering time: 14 seconds):
Shading Rate of "5" (Rendering time: 9 seconds):
Shading Rate of "10" (Rendering time: 8 seconds):
One important quality of shading rate is that it can be set globally, for the entire scene, or it can be changed from one primitive to the next. This allows shading rate to be set at a higher quality setting for only those objects that require it. For example, in this scene the teapot has a very simple shader, while all the other objects have much more detail. We could speed up our rendering (with no undesired artifacts) by attaching per-object shading rate to the teapot. To create a per-object shading rate, simply add the RenderMan shading rate attribute to the teapot. To attach the attributes, follow these steps:
Select the teapot
Open the object in the Attribute Editor.
From the Attribute Editor Menu:
Attributes-> RenderMan-> Manage AttributesSelect "Shading Rate" from the menu and click "Add"
Set the new Shading Rate attribute to "5.0" It will appear in the "Extra RenderMan Attributes" sub-tab.
Per-object shading rates are a very powerful technique that can be used optimize rendering.
5. Pixel Samples
RenderMan provides advanced antialiasing controls, and Pixel Sampling is used to adjust the amount of super-sampling around a pixel. A setting of 3x3 is a medium quality setting and may be sufficient in many cases. You'll find, however, when rendering scenes with fine detail, like fur, or motion blurred objects, that higher values of 4x4, 6x6, or even 11x11 are required to produce an artifact-free image.
In this scene the depth of field effect is grainy (you can see the grain in the grass on the horizon). To create a smooth depth of field effect, increase the pixel samples, which can be found in the RenderMan Globals Quality tab. Set the pixel samples to 11x11. Render again.
You should get an image like the one below, with a nice smooth depth of field effect.
Pixel Samples of "3 x 3" (Rendering time: 21 seconds):
Pixel Samples of "11 x 11" (Rendering time: 32 seconds):
6. Recompute Shadows (and other pre-passes)
When tweaking shaders, an image is often rendered over and over again. It most efficient, of course, to do as little redundant work as possible. One shortcut is to reuse shadow maps (and other pre-passes) as opposed to calculating them every frame. This technique can dramatically increase the speed of renders that use multiple large shadow maps. Other pre-passes can be cached in much the same way, allowing the reuse of occlusion, subsurface scattering, and other effects. To reuse the shadow map in this scene, go to the Shadows settings in the Attribute Editor for the KeyLightShape and toggle the Disk Based Dmaps setting from "Off" to "Reuse Existing Dmap[s]".
Now render again. The shadow map will be reused and will not be computed each time you render.
Certain other passes, such as GlobalDiffuse, created for Global Illumination, have their caching behavior controlled via the Passes Tab of the Render Globals.
- In the Passes field select the pull-down menu (from the downward pointing black arrow) and select the pass.
- Open the Settings sub-tab.
- Switch the Caching Behavior from Compute to Reuse.
7. Enable Ray Tracing only when Required
In RenderMan ray tracing is implemented as a hybrid sub-system, which means ray tracing must be enabled to get effects such as ray-traced reflections, refractions, and shadows. Ray tracing is, by nature, much less memory efficient than pure scanline rendering. Your scenes will render faster and more efficiently when ray tracing is disabled.
In this case, we can get accurate reflections from the teapot and the box by ray tracing the scene. Enable ray tracing by opening the Features tab of the RenderMan Globals and clicking the ray tracing box. Now render the scene again.
The image will take longer, but it will have accurate reflections.
Ray traced reflections (Rendering time: 2 minutes):
8. Summary
You can tune your renders to get the most out of RenderMan if you know which buttons to push. For preview renders, use the lowest quality settings that are acceptable. For final images, increase the settings for high quality images, but take care to only increase the settings as much as is required to avoid extra work. If you familiarize yourself with these speed-quality knobs and buttons, you'll get more renders through production:
- Use the lowest image resolution as possible, particularly during preview rendering.
- Take advantage of crop rendering when tweaking individual details.
- Choose an appropriate shading rate during preview and final images. The appropriate shading rate is the largest value which gives you an acceptable image. Remember to take advantage of the ability to attach individual shading rates to objects.
- Adjust pixel samples to accerlate your renders. Use the lowest quality values for pixel samples as possible, but for final high quality images, pixel samples may have to be increased as high as 12x12 to eliminate aliasing artifacts. Again, use the mininum amount of samples that achieves a high quality image.
- Since ray tracing carries substantial overhead, only enable ray tracing when required.