Shading using RIS
Shading using RIS
Creating RIS nodes
When using RIS, the materials and other nodes are kept in the RIS Shading Node Network.
Important:
RSL materials are not rendered in RIS mode as they are Reyes-only materials. You must use or transfer your assets to RIS materials to render correctly.
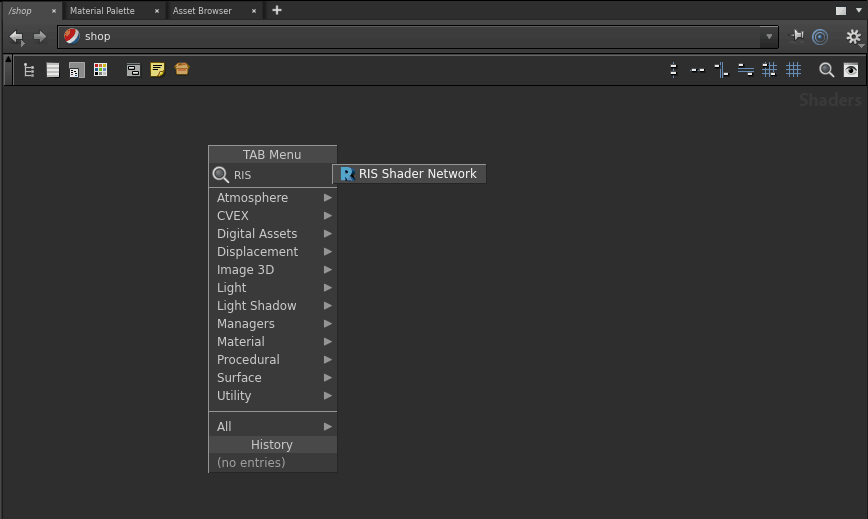
Creating the RIS Shader Network
Once you've created the RIS network, you can see the available options for rendering with the RIS. Your menu options used for shading and rendering those shaders are below:
Tip:
Users may find it helpful to change the labels on the nodes by going to: Edit > Preferences > Network Editor, Nodes, and Trees and selecting "Show Full Input and Output Names on VOP Nodes".
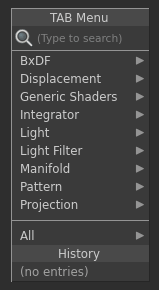
RIS Shader Network Options
- BxDF - You can find your materials contained here.
- Displacement - Here are your shaders for altering geometry at render time.
- Generic Shaders - Used for generating OSL and RMS materials.
- Integrator - This menu option allows you to select the integrator for rendering in your ROP node. Different selections provide you with different rendering features and shading outcomes. The page for rendering Subdivision Surfaces shows an example of the Visualizer Integrator.
- Manifold - This provides options for use with pattern generation.
- Pattern - Here is where you'll find procedural nodes and patterns for use with materials.
Lights and lighting are a topic covered here.
More information can be found in the Houdini Documentation regarding the RISnet.