Ray Tracing
Ray Tracing
Reflections, Refractions, & Caustics
Important
This page has been updated to reflect the changes in the new shading system introduced in RMS 4. Please be sure to download the latest tutorial file package for compatibility.
For this tutorial open the Maya scene, dragon.ma.
(Where are the tutorial files?)
1. First...
In this tutorial we will take a look at ray-traced reflections and refractions. Most familiar ray tracing operations are easy to set up with RMS using the new GP shaders and either the fancy RMS lights or your standard Maya lights.
Open up the Maya scene, dragon.ma. This scene is simple, with a subdivision surface dragon and a NURBS plane inside a polygonal box. We have RMSMatte nodes attached to our ground plane and box (the familiar grid and a simple ramp, respectively), and our dragon is sporting an unadulterated RMSGPSurface (all parameters at their default settings). Our scene is lit with two RMSAreaLight nodes - a rectangular key light and a spherical fill light. If we render now, we'll see something like this:
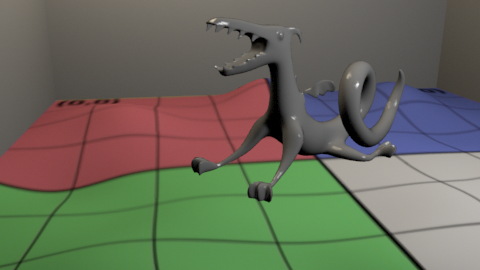
The Maya Scene
Now, the first thing we need to do when we want to use ray tracing is pretty darn simple: enable ray tracing in the RenderMan Globals...
and check the Ray Tracing box in the Ray Tracing section of the Features tab. And thusly, with the default settings, shall we trace rays and behold lovely ray-traced shadows and reflections:
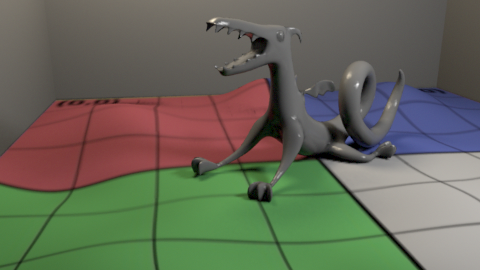
One Ray-traced Dragon
Seriously, it's just as simple as that. That said, don't hurt yourself straining to see the reflections in our little example render. The default settings in this particular scene don't create reflections that really jump out at you, so let's cheat a li'l bit and bump up the Reflection Scale to 2.0. If you now focus on the dragon's belly and re-render, you can see what's going on.
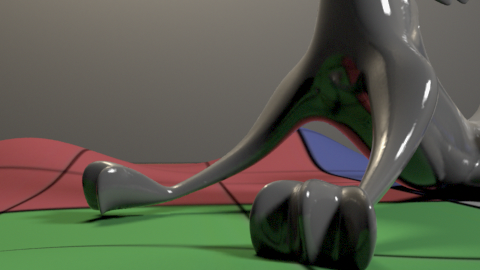
Reflections Close-up
2. Metal, Dude
So, what we rendered there is... um... plastic, or some kind of uber-shiny lacquered paint, or something. Pretty, but not something you render every day. What do you render every day? Well, if you're like me, you render a lot of metal. Can't get enough of the stuff. And how do we get a metal look from our fancy-pants RMSGPSurface? Simple: we increase the Metallic paremeter in our Specular Controls, let's say... to 0.5 for a starter.
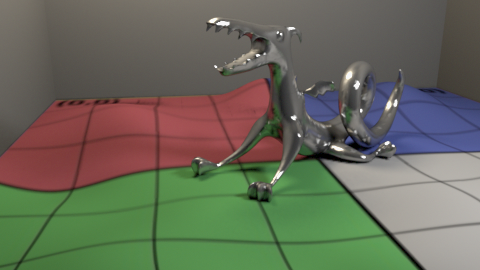
Metal
That's totally metal. (Full disclosure: we tweaked our quality settings again for the previous render.) If you take a look under Advanced Specular you will find all the cherry-on-top controls for our GPSurface, starting with settings for the sampling behavior. For the image above we bumped up the Minimum Reflection Samples to 64, and the Maximum Reflection Samples to 256 - nothing too crazy, but enough to clean up the reflections a bit. Everything else remained at the default.
Now let's explore that whole Dual Specular thing... the GPSurface nodes support two specular lobes, for things like simulating a clear coat over a specular surface, like a nicely buffed-out clear coat of lacquer over the Candy Apple Red finish on a Stratocaster. We, however, don't have a Strat; we have a dragon. So, we're gonna go for a shiny golden dragon, such as one might expect to see in a place where they keep shiny golden dragons.
This, again, is just a few simple tweaks. Generally, a material like this will have differing "Roughness" for each specular lobe, and typically the second, shinier specular will have the tighter highlights. So, first, let's bump the Roughness parameter of our primary Specular up to 0.15. Then we'll change our Specular Color to something more suitable (we attached a simple burnt orange-yellow-light brown ramp), and let's bump the Metallic parameter up to 1.00. For our tiny renders, we're going to leave the Reflection Scale at 2, but in the real world you might not want to do such things. Finally, in the Dual Specular section, crank the Specular Blend up to 1.00 (the defaults are fine for the rest of the settings).
Annnd... RENDER!
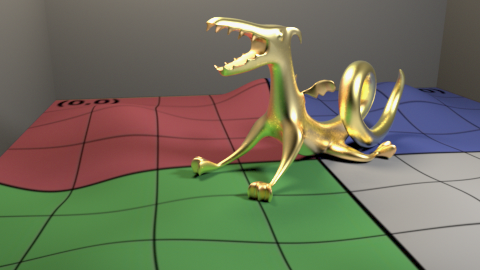
Behold the Golden Dragon!
Note
A Note About "Advanced Specular"
Most of the settings in the Advanced Specular section are quality-related, but there are a few that can substantively change the fundamental behavior of your material. Most are fairly self-explanatory - Enable Backside Reflections or Soften Reflected Highlights, for example - but a couple warrant a bit more info:
Tangent Source - The tangent settings are relevant only if you are computing Anisotropy in either of the specular lobes. Your choice of source is highly dependent upon your model. Typically, s is appropriate for an imported mesh that you did not create with Maya, with good UVs, mesh for Maya-generated polygonal meshes, input is a good choice for special effects (connect something interesting, like a Bulge, to the Tangent Gradient), and default is appropriate for NURBS.
Tangent Gradient - affects how your tangent is computed, altering the anisotropy of your highlights.
3. Refraction!
Light refracts through transparent surfaces, such as glass. Ray tracing allows you to re-create this effect with ease, and RenderMan Studio ships with a "GP" node designed to give you a refractive material with minimal effort - RMSGlass.
Go ahead and create a new RMSGlass node, via the shelf or Hypershade or the RenderMan menu, and attach it to our dragon. Do the Hokey-Pokey and turn yourself around, then render...
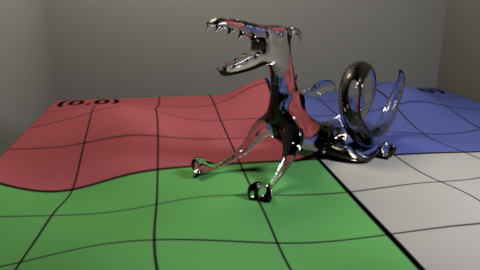
One Refractive Glass Dragon
All the basics are there, nothing to it. Of course, that doesn't mean there's nothing left for you to do. As usual, the default settings are intended for speedy, draft-quality renders. Also, notice that you have basically the same controls over the specular component of your material that you had with RMSGPSurface, but there is only a single specular lobe.
Note
Glass casts shadows. RMSGlass gives you control over its shadowing properties in the Shadows section. Specifically, you can specify a set, or category, of lights to which the material responds, you can choose the nature of the shadows via the Computes Opacity setting (Opaque makes black shadows, Compute makes colored shadows, and ViewDependent makes colored shadows with a little Fresnel component), and adjusts the falloff when ViewDependent is selected.
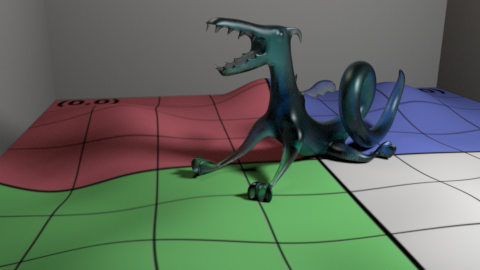
Next, let's clean things up a bit, by bumping the various sampling settings in our lights and the Advanced Specular settings for our RMSGlass node. Now, if you've got a fancy golden dragon, do you think you'd have a plain old glass dragon, too? No. You'd have a fancy lead crystal dragon. And lead crystal has a higher Index of Refraction (IOR) than glass. So, let's kick our IOR setting up to 1.7. And, zooming in, tumbling and rotating our camera a bit, we render...

One Fancy-Pants Crystal Dragon
There's much more we can do, of course. We can play with the Roughness to simulate frosted glass. We can color the material and its specular component. Heck, why not? If you're gonna talk the talk, you gotta render the render...
One Frosty Dragon
4. Caustics!
Tell me, what's the point of rendering glass if you're not going to render some fancy caustic effects to go with it?
As you might have guessed, looking at the various ways that RMS has broken down shading and lighting, we've got a new light node, the RMSCausticLight. Currently, this can only be created via the Hypershade, but it will be available in the shelf and the RenderMan menu. And, that done, there are two other things that we need to do: we need to add an appropriate shading model to our glass shader, and we need to generate photons.
First, the shading model... with our RMSGlass node selected, from the Attributes menu, select RenderMan->Add Caustic Control. This will add Extra RenderMan Attributes, specifically, a new Shading Model parameter. Choose Glass.
Second, open the RenderMan Controls window. Select the perspShapeFinal pass, and, in the Settings tab, increase the Photons Emitted from 0 to 1,000,000, and specify a name for the Caustic Photon Map - caustics.ptc is reasonable. Note that the Photon lifetime parameter is transient, by default, meaning that photons will be generated. Choose file to reference an existing photon map.
You can do this with the frosty dragon we ended with during the last step, or the crystal dragon, or even the metal or gold dragon from way back when (but if you do go metal, don't choose the glass shading model, choose Chrome). We went back to the crystal dragon, and we've moved our camera around to give us a good look at our shadow, where there be caustics, and we've hidden the fill light so we get a sharper shadow, annnd... render!
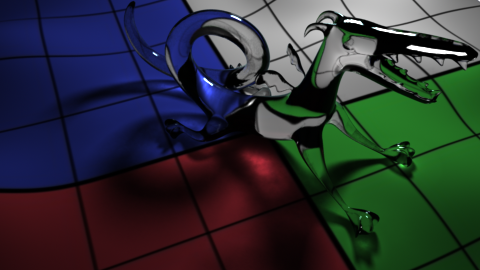
Caustics
5. And In Conclusion...
That's that. Simple, easy, free and breezy. With these new shading nodes and lights, RMS has implemented a fully-integrated, easy-to-use "GP" shading system designed with ray tracing front and center, providing the basis for a pipeline built on the "physically plausible" shading techniques introduced in PRMan 16. Users can learn more about ray tracing with RMS (and alternatives) in the Global Illumination and Subsurface Scattering tutorials. There's also some more sophisticated shading, including layering, going on in the RMS4 Shading Tour.
Look for additional updates soon, including new material in RenderMan University.